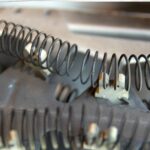
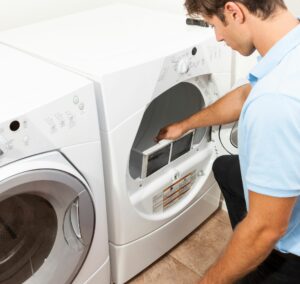
Is the airflow in your dryer noticeably lacking? Does powering your dryer off and on again not seem to make a difference? These might be signs that there’s a problem with your dryer’s heating element. As the name suggests, this part of your dryer ensures that heat is produced when drying your clothes. The heating element can stop working due to a blown thermal fuse, wiring problems, or even a burnt-out heating element. For this reason, it’s important to know how to replace heating element in dryer.
1. Find A Replacement Heating Element
The first step in how to replace heating element in dryer is to obtain a new heating element for your dryer. The best approach to this step is usually to consult the respective user manual for your dryer for its make and model. You can track down and order a new heating element for your dryer using that information.
2. Turn Off And Unplug The Dryer
Once your new heating element arrives, you can officially begin the process of how to replace heating element in dryer. For your safety and convenience, turn off and then unplug your dryer. This ensures that you’ll be able to complete this task successfully without hurting yourself.
3. Remove Back Panel
For this step in how to replace heating element in dryer, you’ll need a nut or screwdriver to remove the back panel. The back panel of your dryer can be accessed by moving it away from the wall. You’ll then use the nut or screwdriver to remove the screws. Keep the screws in a safe place to reassemble the dryer when the time comes. Gently remove the back panel and set it aside before continuing on to the next step.
4. Disconnect Wires And Other Parts
After removing the back panel, you’ll need to access the heating element itself. First, you’ll need to find the housing unit where the heating element is found. There will usually be two sensors, one at the top and the other at the bottom of the housing unit. You’ll need to disconnect the wires and unscrew the sensors carefully. After removing the sensors, disconnect and remove the heating fuse. Once these parts are disconnected and set aside in a safe place, it’ll be time to replace the heating element.
5. Disconnect And Remove The Old Heating Element
Before you can replace the heating element, you’ll need to disconnect and remove the old one. Use the screwdriver to disconnect the old heating element from the dryer. Depending on the type of dryer you own, you may need to adjust its position for easier access. Ensure that any wires connected to it are removed before finally, safely discarding the old heating element.
6. Install And Connect The New Heating Element
For this essential step in how to replace heating element in dryer, you will finally get to install and connect the new heating element. Secure the new heating element in the appropriate position in your dryer and follow the necessary steps to connect it to the respective wires. Don’t forget to use the screwdriver to ensure that it’s absolutely secure.
7. Reassemble The Dryer
Now that the new heating element is installed and connected to your dryer, it’s time to reassemble it. You’ll work your way backward, by reconnecting the heating fuse, sensors, and housing unit first. Once those items are back in place, reinstall the back panel, reconnect, and turn on your dryer.
Appliance Repair Grand Prarie Is Here To Help!
Hopefully, you feel more confident about how to replace heating element in dryer. If you are still unsure about your ability to execute this task with little to no issue, that’s okay. In fact, that’s why there are experts who can help you get that job done, and our technicians at Appliance Repair Grand Prairie are the best in Texas. Contact us today, and we will help you get your dryer back in shape.


