
How do you know when it’s time to replace a dryer belt? There are quite a few signs you need to look out for. Is your dryer making any unusual noises? Has it been a struggle to get your dryer started lately? Does the dry cycle stop before it’s done? If any of these things are happening while using your dryer, there might be a problem with your dryer belt. In this case, the dryer belt will need to be replaced as soon as possible. If you wish to know how to replace a dryer belt, that wish can be granted if you keep reading.
1. Order The Correct Dryer Belt
The first step in learning how to replace a dryer belt is to obtain the replacement itself. Check the brand and model of your current dryer, and use that information to find and order the correct dryer belt. Using a dryer belt that doesn’t work with your current dryer will only create more unnecessary problems, so ordering the right replacement is absolutely essential.
2. Turn Off And Unplug Your Dryer
Before replacing the dryer belt, you want to make sure you can complete this task safely. To avoid any accidents or injuries, turn off and unplug your dryer. Attempting to replace the dryer belt while the machine is powered on can put you at risk of getting electrocuted. As an extra precaution, wear gloves while you replace your dryer belt. Ensure there is reasonable space between the wall and the wall before continuing.
3. Remove The Top And Front Panels
For this step in how to replace a dryer belt, you’ll need to gain access to it. You’ll be able to access the drum and belt by removing your dryer’s top and front panels. Before doing either of these, remove the lint screen by lifting it out and using a screwdriver to detach it. Once the lint screen is out of the way, remove the top panel with a putty knife. You’ll slide the putty knife beneath the top panel’s left and right-facing edges, and the panel should make a pop when it opens.
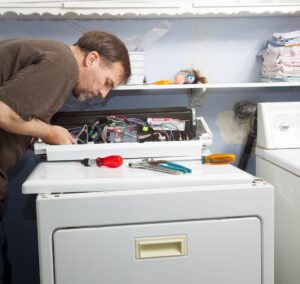
Now it’s time to remove your dryer’s front panel. First, you’ll need to find the door switch wire and disconnect it so you can easily remove the front panel. Next, detach the front panel by unscrewing it from the dryer with a screwdriver. Ensure that the screws are kept somewhere safe for when it’s time to reassemble the dryer.
4. Remove Old Belt From Drum
After removing the top and front panels, you’ll be getting to the crux of how to remove a dryer belt. The dryer belt is wrapped around the drum. For this reason, be very careful when gently pulling the belt out of the dryer.
5. Install The New Dryer Belt
After disposing of the old, broken dryer belt, install the replacement. Gently and carefully wrap the new belt around the drum by threading it through the idler pulley. Once the new dryer belt is installed, proceed to reassemble the rest of your dryer. Start by putting the front panel back into place and securing it, followed by the top panel. Finally, you can replug, turn on the dryer, and test out the new dryer belt.
Work With The Best Dryer Technicians In Grand Prairie!
Knowing how to replace a dryer belt will make you more knowledgeable about dryer maintenance and care. Unfortunately, washers and dryers sometimes face problems that can’t be easily fixed on your own. However, if you are looking for that additional help in Grand Prairie, you have a very great local option with Appliance Repair Grand Prairie. Whether it’s your washer or dryer, our appliance technicians are up to facing any challenge. Contact us today to return your dryer to working condition.